
NewsDetails
Engine Oil Filter Replacement Guide: When and How to Change It
author:Chengrui time:2026-05-01 16:58:29 Click:159
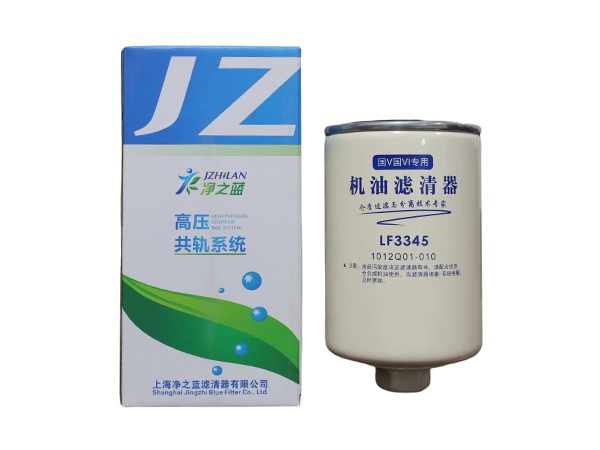
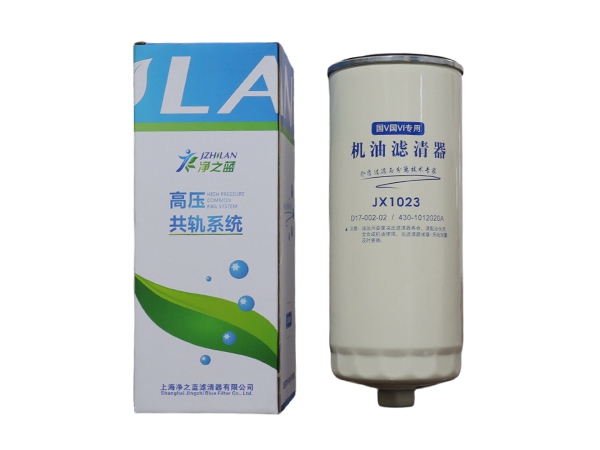
An engine oil filter plays an indispensable role in keeping your vehicle’s engine clean, efficient, and durable. It filters out dirt, metal particles, and other impurities from the engine oil, ensuring seamless lubrication and minimizing wear and tear on engine components. However, just like all other automotive parts, the oil filter requires regular replacement to sustain its optimal performance. This guide will teach you when to replace your engine oil filter and how to do it correctly.
What Does an Engine Oil Filter Do?
The engine oil filter is specifically designed to trap contaminants that circulate in the engine oil. As the oil flows through the engine, it picks up various impurities, including:
Metal shavings caused by normal engine wear
Dust and dirt particles from the environment
Carbon deposits resulting from fuel combustion
Sludge and other debris buildup
Without a properly functioning oil filter, these contaminants can cause damage to engine parts, degrade performance, and even result in complete engine failure.
When Should You Replace the Oil Filter?
Most vehicle manufacturers advise replacing the oil filter each time you change the engine oil. However, the exact replacement interval varies depending on your driving conditions and the type of vehicle you own.
General Guidelines:
Every 5,000–10,000 km (3,000–6,000 miles): This is the standard oil change interval for most vehicles on the market.
Every oil change: This is the best practice to ensure the long-term health of your engine.
More frequently: If you frequently drive under harsh conditions, such as dusty roads, heavy traffic, towing heavy loads, or extreme hot or cold temperatures.
Signs Your Oil Filter May Be Clogged:
Decreased engine performance and power
Dark, murky, or excessively dirty engine oil
Illuminated engine warning light on the dashboard
Unusual or abnormal engine noises
Engine overheating problems
How to Change an Engine Oil Filter (Step-by-Step)
Replacing an engine oil filter is a relatively straightforward maintenance task that you can complete at home with basic tools.
Tools and Materials Needed:
A new oil filter (compatible with your vehicle model)
Engine oil (as recommended by your vehicle’s manufacturer)
Oil filter wrench
Oil drain pan
Protective gloves and clean rags
Jack and jack stands (if required to access the oil filter)
Step 1: Prepare the Vehicle
Park your vehicle on a level surface and allow the engine to cool down completely. If necessary, use a jack to safely lift the vehicle and secure it with jack stands for easier access to the oil filter and oil pan.
Step 2: Drain the Old Oil
Place the oil drain pan directly under the engine’s oil pan. Remove the drain plug and let the old engine oil drain completely into the pan.
Step 3: Remove the Old Oil Filter
Use an oil filter wrench to loosen and remove the old oil filter. Exercise caution, as the filter may still contain hot oil that can cause burns.
Step 4: Prepare the New Filter
Before installing the new oil filter, take the following steps:
Lightly coat the rubber gasket on the new filter with fresh engine oil.
This coating ensures a proper seal between the filter and the engine, and also makes it easier to remove the filter during the next replacement.
Step 5: Install the New Oil Filter
Screw the new oil filter into place by hand. Once it is hand-tight, tighten it further according to the manufacturer’s instructions—typically, this means an additional slight turn after hand-tightening.
Step 6: Add New Engine Oil
Reinstall the oil drain plug securely. Then, refill the engine with fresh engine oil, using the correct type and amount specified in your vehicle’s owner’s manual.
Step 7: Check for Leaks
Start the engine and let it run for a few minutes. Carefully inspect the area around the new oil filter and the oil drain plug for any signs of oil leakage.
Tips for Better Engine Maintenance
Always use a high-quality oil filter that is compatible with your engine model.
Change the engine oil and oil filter together to ensure the best possible performance and engine protection.
Avoid over-tightening the oil filter, as this can damage the rubber gasket and cause leaks.
Regularly check the engine oil level between oil changes to ensure it remains within the recommended range.
Strictly follow the maintenance schedule provided by your vehicle’s manufacturer.
Conclusion
Although small in size, the engine oil filter is a crucial component that protects your vehicle’s engine from damage and keeps it running smoothly. Regular replacement of the oil filter not only enhances engine performance but also extends the overall lifespan of your vehicle. By following the recommended maintenance schedule and the correct replacement steps outlined in this guide, you can ensure that your engine stays clean, efficient, and reliable for years to come.
References
GB/T 7714: Engine Oil Filter Maintenance: Best Practices and Replacement Guidelines. Journal of Automotive Maintenance
MLA:The Impact of Oil Filter Replacement Intervals on Engine Longevity. International Journal of Automotive Engineering
APA: DIY Oil Filter Replacement: A Step-by-Step Guide for Vehicle Owners. Automotive Technology Today
 Recommended Products


 Contact us
—— Contact:Mr. Gao
—— Tel:+86 19565234361
—— Email:gaomark706@gmail.com
—— Url:https://www.jzl-filter.com
—— Address:Hejian City, Cangzhou City, Hebei Province